
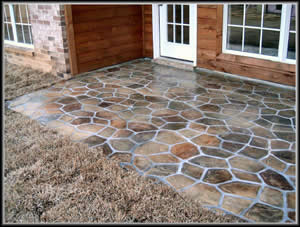
Figure 1 - Flagstone patio installation
Note: If you have an older installation of concrete, brick pavers or flagstones and you need to add additional sand due to washout, you will not get a good result unless you remove all of the old silica sand using a pressure washer. The reason is that the polymeric sand needs to reside throughout the full depth of the joint in order for it to protect against water ingress, weed and grass seed germination and ants. A shallow top layer of polymeric sand will not accomplish these tasks. After removing the silica sand with the pressure washer the joint must be completely dry before you install the new polymeric sand.
Note: If you are installing the polymeric sand with flagstone, as shown in Figure 1 there is a debate on how wide the joint can be. Some manufacturers are stating that their polymeric sand product can be used in joints as wide as 2 inches, while many professional installers are saying that they have encountered problems with joints over 1 inch. The reason for the disagreement could be as simple as the specific product being used or could be related to the proper installation of the base materials and/or climate conditions.
The biggest detriment to the proper and successful installation of polymeric sand is water in any form! Check the weather forecast and make sure that you have enough time to fully complete the installation of the polymeric sand prior to rain. Also, check your automatic sprinkler systems to ensure that you won’t have a surprise watering of lawns or plants while you are in the middle of the installation of the polymeric sand.
Note: The polymeric sand is designed to bond to the concrete or brick pavers when water is added to the mixture. Any polymeric sand that is on the top of the concrete or brick pavers when water is applied will bond to the surface and because the polymeric sand is designed to grip those surfaces, it is difficult and time consuming to remove.
Step 1:
Complete the entire installation of the concrete or brick pavers prior to installing the polymeric sand. This includes cutting in and installing any and edging restraints.
Step 2:
Sweep the polymeric sand into all of the joints between the pavers. Sweep the sand in all directions – left to right, top to bottom and diagonally to ensure that all joints are filled.
Step 3:
Using a gas or electric compactor, as shown in Figure 2 or a tamper
as shown in Figure 3, compact all of the pavers. Compactors and tampers can be rented from most tool rental facilities or purchased. Make sure your compactor or tamper gets into the corners.

Figure 2 - Electric compactor
Step 4:
Repeat Step 2.
Step 5:
Repeat Step 3.
Step 6:
Repeat Step 2. Make sure that the polymeric sand is basically level with the tops of the concrete or brick pavers. This ensures that all areas were weed or grass seeds could commence to germinate have been filled.
Step 7:
Visually inspect the tops of the brick pavers to ensure that there is no sand remaining on them. Double check any corners as these are common places for excess polymeric sand to remain. Use a soft broom and/or blower set to a low speed to remove any remaining bits of sand prior to applying the water. Once you are positive that there is no remaining polymeric sand on the tops of the concrete or brick pavers proceed to Step 8.
Note: Check the crevices between the treads in your work boots. It is highly likely that you have polymeric sand trapped there. This polymeric sand could easily come loose during the wetting process and end up stuck to the top of the concrete or brick pavers.
Step 8:
Now comes the point where you will moisten the polymeric sand and activate the polymers to harden it. You want to set the hose nozzle to a fine mist, you want to wet the concrete or brick pavers but you do not want to remove the polymeric sand from between the joints.
If you are working on a walkway, start at one end and spray a mist of water over the concrete or brick pavers.
If you are working on a driveway or patio start at the top, the highest end, and work downwards towards the lowest end or bottom.
In either case the intent is to gently wash off any remaining polymeric sand dust and/or particles from the surface of the concrete, brick pavers or flagstone while moistening the sand between the joints but not removing the sand from between the joints.
Step 9:
Allow the polymeric sand to cure for 15 to 20 minutes and then apply another mist of water as you did in Step 8.
Note: While the polymeric sand may take as long a full day to completely cure you can, in general, safely walk on the finished concrete or brick pavers within a half an hour without concern that you will pick up the wet polymeric sand on your work boots and leave it deposited on the surface of the pavers in another location. That being said, it is always wise to check the bottom of your work boots before proceeding on!